
|
阅读:7802回复:3
vue+springboot+阿里云短信服务(集成redis实现验证码登录业务)阿里云短信服务-介绍 阿里云短信服务(Short Message Service)是广大企业客户快速触达手机用户所优选使用的通信能力。调用API或用群发助手,即可发送验证码、通知类和营销类短信;国内验证短信秒级触达,到达率最高可达99%;国际/港澳台短信覆盖200多个国家和地区,安全稳定,广受出海企业选用。 应用场景: 验证码 短信通知 推广短信 购买: 进入阿里云官网,搜索短信服务,选择一个便宜的购买就行了 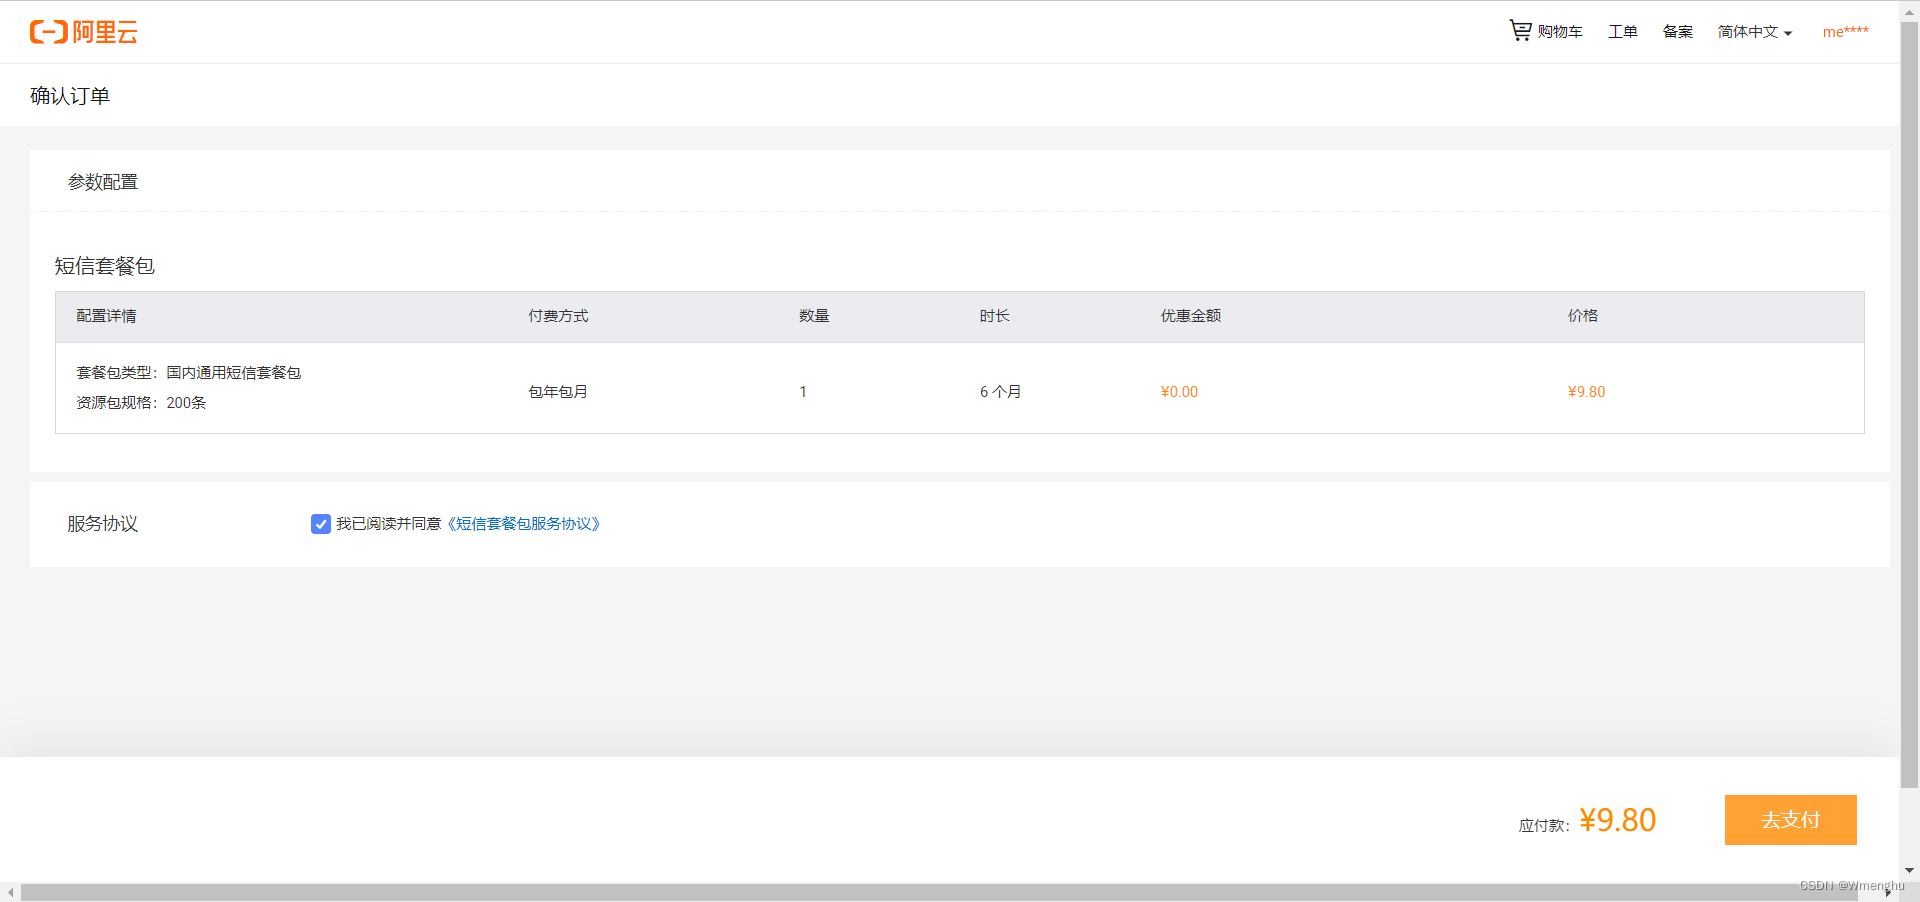
购买过后可以进入控制台查看: 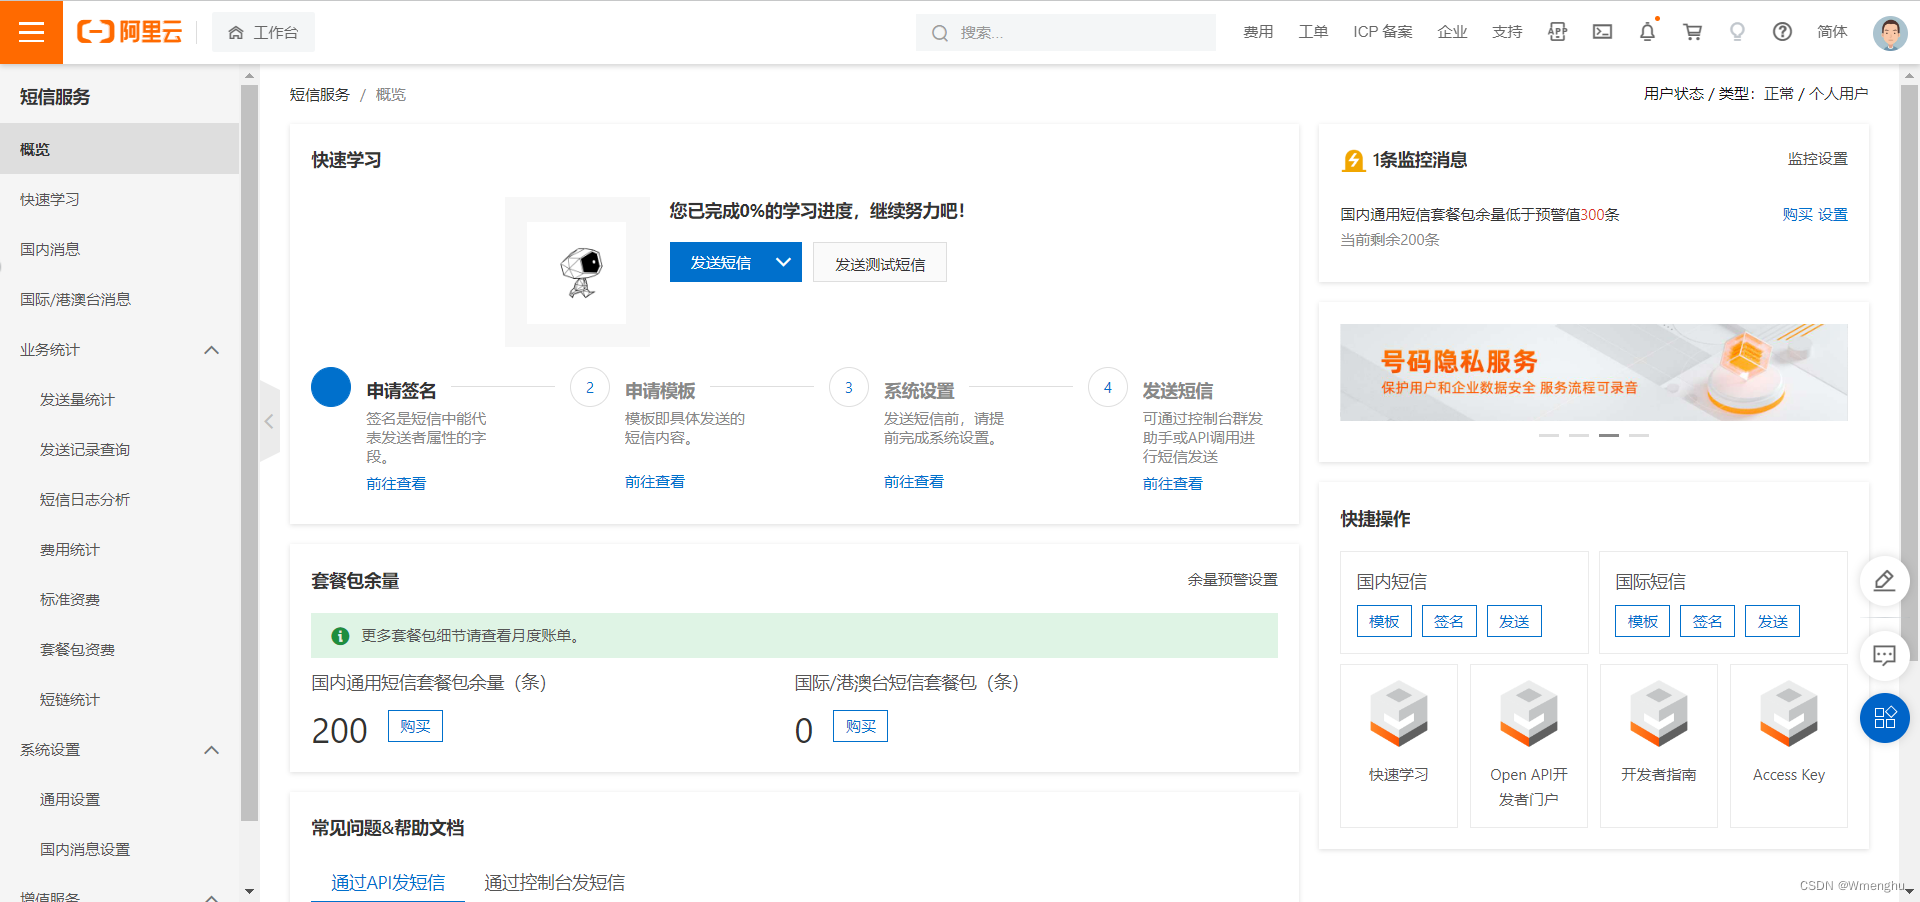
1》首先要设置签名:短信签名是短信发送者的署名,表示发送方的身份。 点击左侧国内消息 看到签名管理,点添加申请一个 2》之后点击 模板管理: 模板是包含了短信发送内容,场景,变量信息。 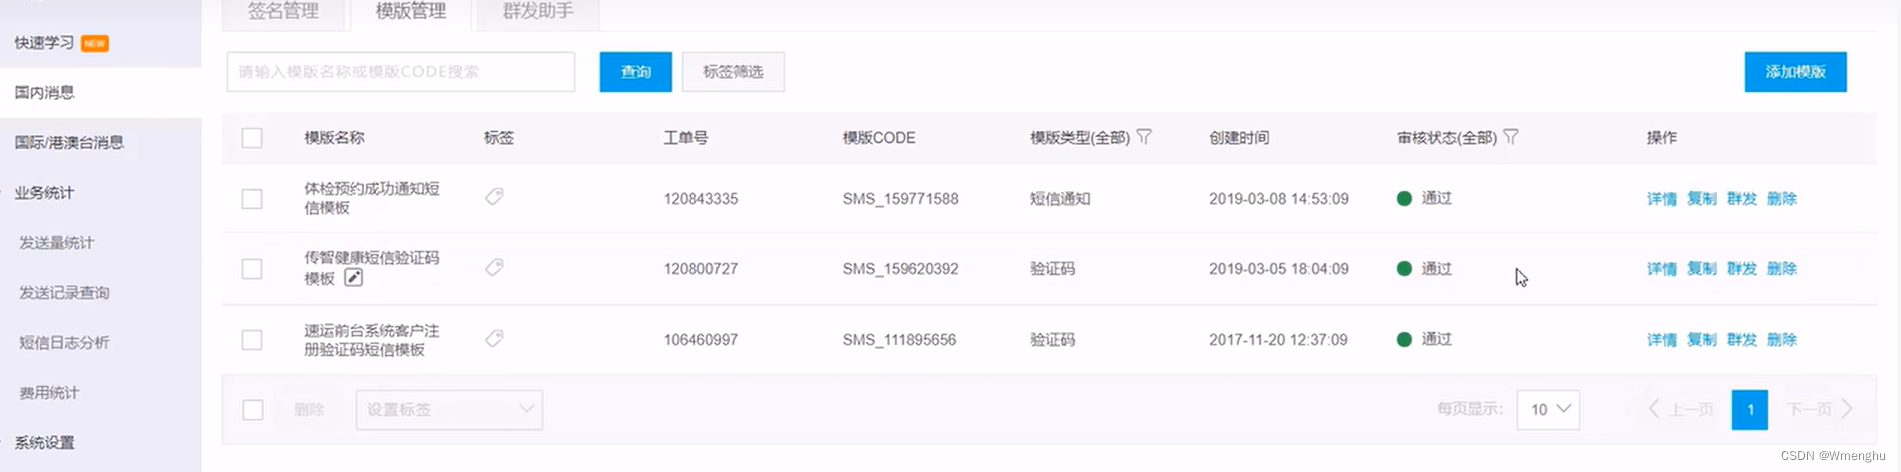
模板张这样: 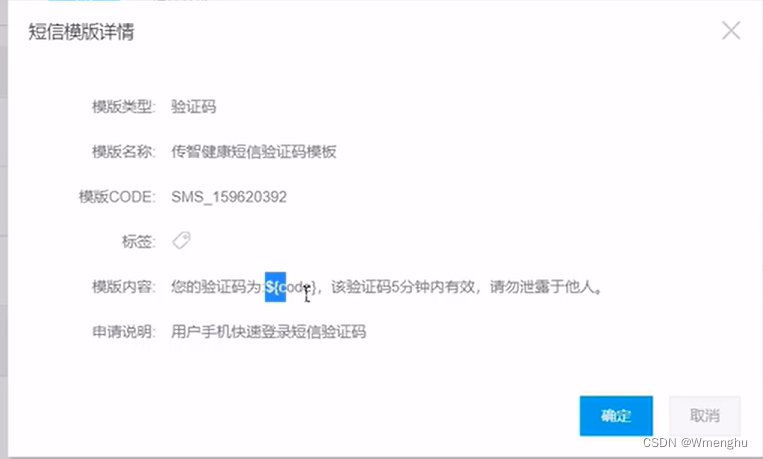
2 一般模板审核,一到两个工作日 3》光标移动到用户头像上,在弹出的窗口中点击【AccessKey管理】 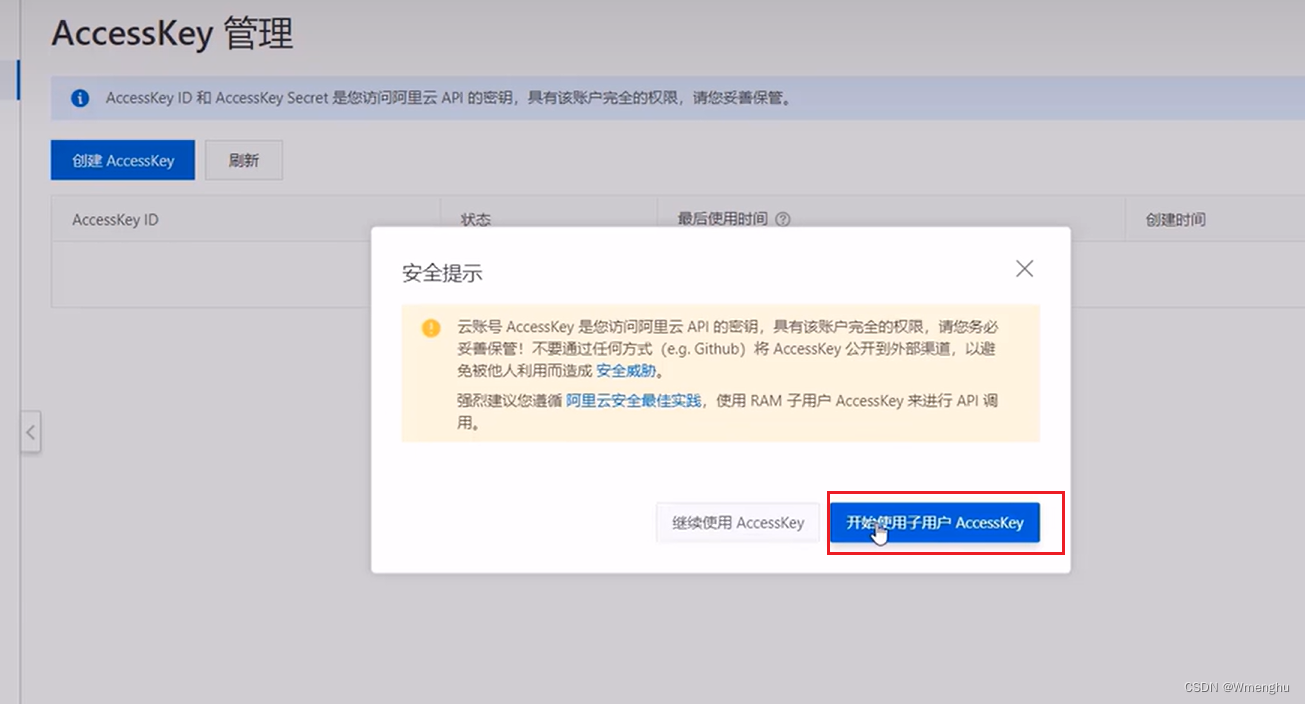
选择使用子用户AccsessKey,前面那个如果泄露了,它可以操作你账户下的所有功能 然后去创建一个用户 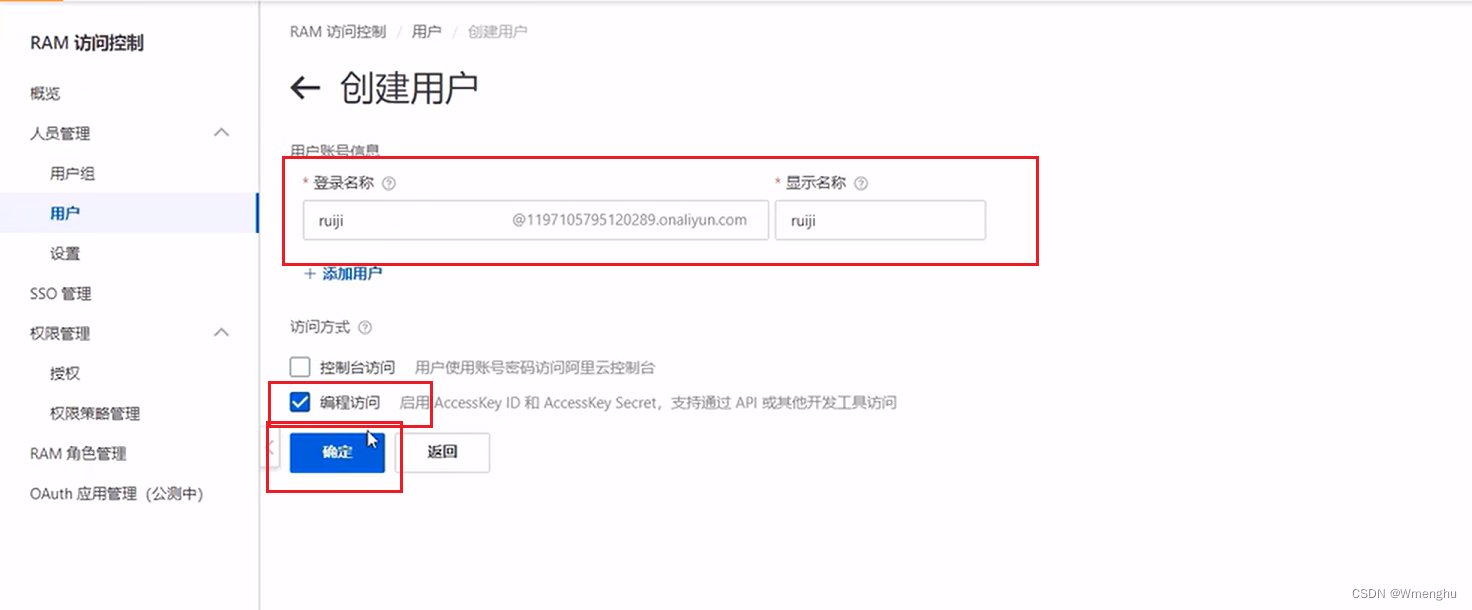
然后去给刚创建的用户分配权限,key在用户界面的最下面,往下滑,这样,这个用户的key只有短信服务的权限,若泄露了你也可以点击禁用或者删除 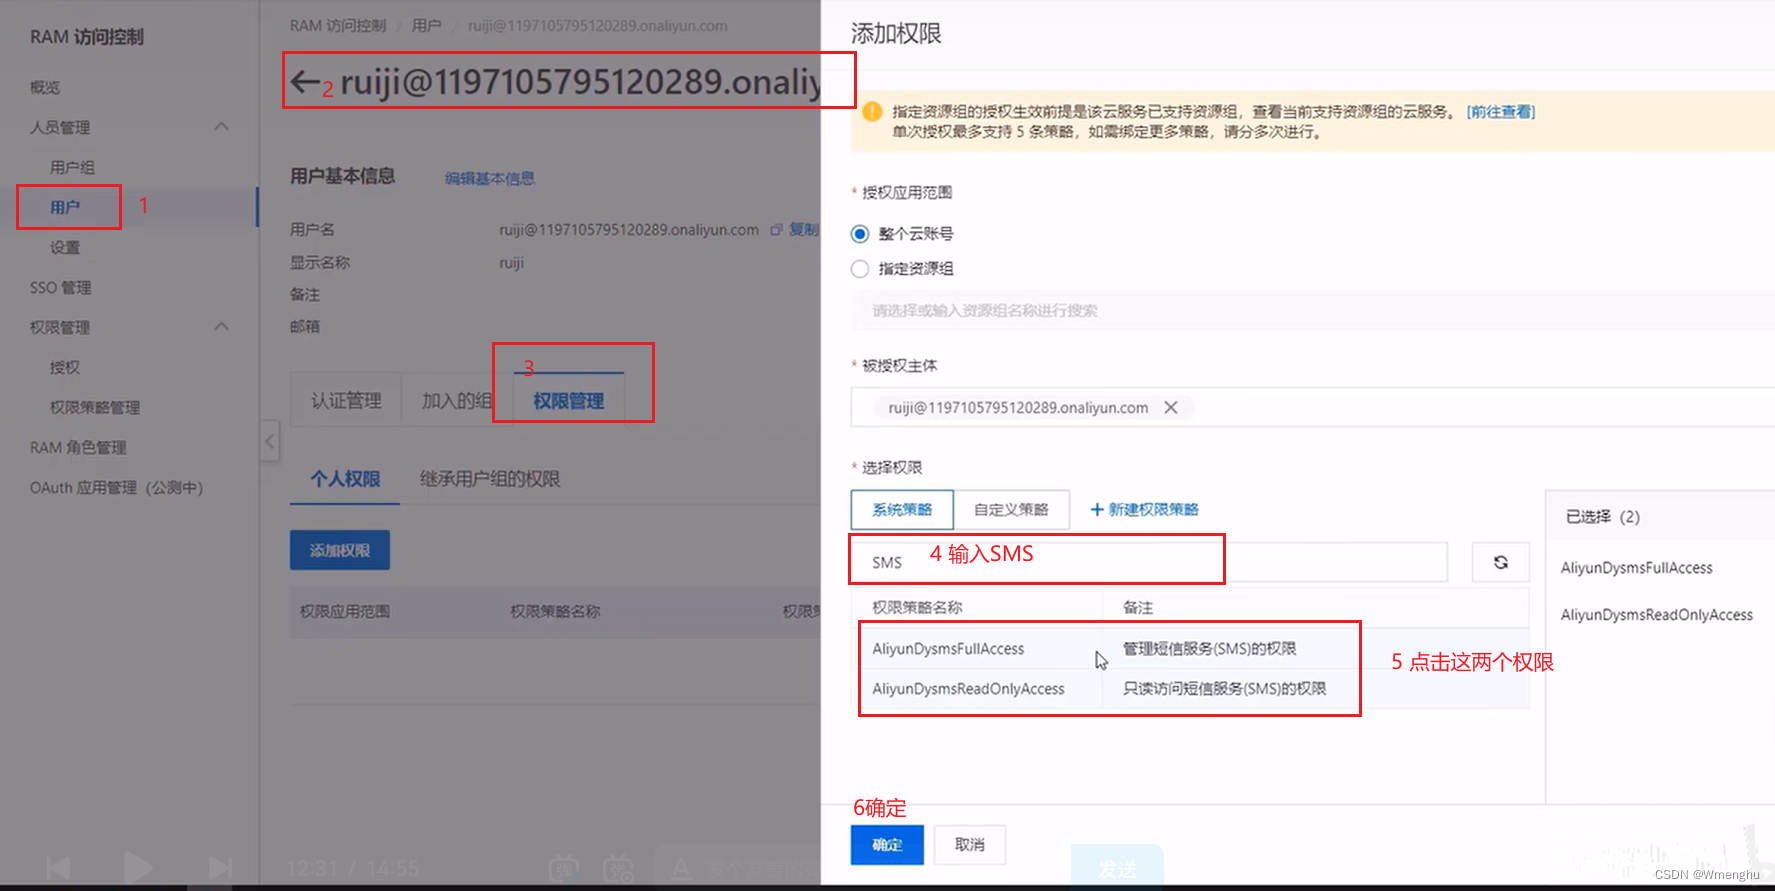 |
|


|
沙发#
发布于:2022-08-15 16:00
SpringBoot要做的工作: 1需要的jar <dependency> <groupId>com.aliyun</groupId> <artifactId>aliyun-java-sdk-core</artifactId> <version>4.5.16</version> </dependency> <dependency> <groupId>com.aliyun</groupId> <artifactId>aliyun-java-sdk-dysmsapi</artifactId> <version>2.1.0</version> </dependency> 2 封装后的发送的工具类(里面的 AccessKey 和密码填写自己的 预留的有双引号 ): 也可以参考官网自己封装 Java SDK import com.aliyuncs.DefaultAcsClient; import com.aliyuncs.IAcsClient; import com.aliyuncs.dysmsapi.model.v20170525.SendSmsRequest; import com.aliyuncs.dysmsapi.model.v20170525.SendSmsResponse; import com.aliyuncs.exceptions.ClientException; import com.aliyuncs.profile.DefaultProfile; /** * 短信发送工具类 */ public class SMSUtils { /** * 发送短信 * @param signName 签名 * @param templateCode 模板 * @param phoneNumbers 手机号 * @param param 参数 */ public static void sendMessage(String signName, String templateCode,String phoneNumbers,String param){ DefaultProfile profile = DefaultProfile.getProfile("cn-hangzhou", "", ""); IAcsClient client = new DefaultAcsClient(profile); SendSmsRequest request = new SendSmsRequest(); request.setSysRegionId("cn-hangzhou"); request.setPhoneNumbers(phoneNumbers); request.setSignName(signName); request.setTemplateCode(templateCode); request.setTemplateParam("{\"code\":\""+param+"\"}"); try { SendSmsResponse response = client.getAcsResponse(request); System.out.println("短信发送成功"); }catch (ClientException e) { e.printStackTrace(); } } } 生成验证码的工具类: import java.util.Random; /** * 随机生成验证码工具类 */ public class ValidateCodeUtils { /** * 随机生成验证码 * @param length 长度为4位或者6位 * @return */ public static Integer generateValidateCode(int length){ Integer code =null; if(length == 4){ code = new Random().nextInt(9999);//生成随机数,最大为9999 if(code < 1000){ code = code + 1000;//保证随机数为4位数字 } }else if(length == 6){ code = new Random().nextInt(999999);//生成随机数,最大为999999 if(code < 100000){ code = code + 100000;//保证随机数为6位数字 } }else{ throw new RuntimeException("只能生成4位或6位数字验证码"); } return code; } /** * 随机生成指定长度字符串验证码 * @param length 长度 * @return */ public static String generateValidateCode4String(int length){ Random rdm = new Random(); String hash1 = Integer.toHexString(rdm.nextInt()); String capstr = hash1.substring(0, length); return capstr; } } 验证码业务需求分析: 使用验证码的好处 通过手机号来区分不同的用户 1.方便快捷,无需注册,直接登录 3.使用短信验证码作为登录凭证,无需记忆密码 3.安全 登录流程: 输入手机号》获取验证码》输入验证码》点击登录》登录成功(若是新用户,把信息保存到表中) 涉及到的表: 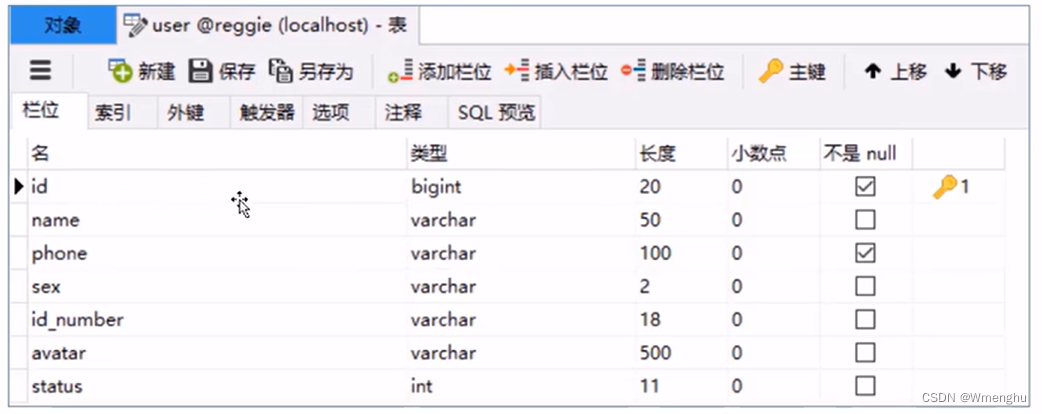
处理逻辑: 1、在服务端UserController中注入RedisTemplate对象,用于操作Redis 2、在服务端UserController的sendMsg方法中,将随机生成的验证码缓存到Redis中,并设置有效期为5分钟3、在服务端UserController的login方法中,从Redis中获取缓存的验证码,如果登录成功则删除Redis中的验证码 导入redis架包 <dependency> <groupId>org.springframework.boot</groupId> <artifactId>spring-boot-starter-data-redis</artifactId> </dependency> |
|
|
板凳#
发布于:2022-08-15 16:03
实现代码+逻辑
import com.baomidou.mybatisplus.core.conditions.query.LambdaQueryWrapper; import com.menghui.common.R; import com.menghui.entity.User; import com.menghui.service.UserService; import com.menghui.utils.SMSUtils; import com.menghui.utils.ValidateCodeUtils; import lombok.extern.slf4j.Slf4j; import org.apache.commons.lang.StringUtils; import org.springframework.beans.factory.annotation.Autowired; import org.springframework.data.redis.core.RedisTemplate; import org.springframework.web.bind.annotation.PostMapping; import org.springframework.web.bind.annotation.RequestBody; import org.springframework.web.bind.annotation.RequestMapping; import org.springframework.web.bind.annotation.RestController; import javax.servlet.http.HttpSession; import java.util.Map; import java.util.concurrent.TimeUnit; @RestController @RequestMapping("/user") @Slf4j public class UserController { @Autowired private UserService userService; @Autowired private RedisTemplate redisTemplate; /** * 发送手机验证码 * @param user * @return */ @PostMapping("/sendMsg") public R<String> sendMsg(@RequestBody User user, HttpSession session){ // 获取手机号 String phone = user.getPhone(); if (StringUtils.isNotEmpty(phone)){ // 生成随机4位验证码 String code = ValidateCodeUtils.generateValidateCode(4).toString(); log.info("code={}",code); // 调用阿里云提供的短信服务API完成发送短信 SMSUtils.sendMessage("梦徽酒店","",phone,code); // 将生成的验证码缓存到Redis种,设置有效期2分钟 redisTemplate.opsForValue().set(phone,code,2, TimeUnit.MINUTES); // 没有redis 将生成的验证码爆粗到Session // session.setAttribute(phone,code); R.error("手机验证码发送成功"); } return R.error("发送失败"); } @PostMapping("/login") public R<User> login(@RequestBody Map map, HttpSession session){ log.info(map.toString()); // 获取手机号 String phone = map.get("phone").toString(); // 获取验证码 String code = map.get("code").toString(); String codeInSession = redisTemplate.opsForValue().get(phone).toString(); // 如果刚刚村的是session则 从session中获取保存的验证码 //String codeInSession = (String) session.getAttribute(phone); // 进行验证码的比对 if (codeInSession!=null && codeInSession.equals(code)){ // 如果比对成功,则登录成功 LambdaQueryWrapper<User> queryWrapper = new LambdaQueryWrapper<>(); queryWrapper.eq(User::getPhone,phone); // 根据手机号去查询 User user = userService.getOne(queryWrapper); // 判断手机号对应的是否为新用户 if (user == null){ user = new User(); user.setPhone(phone); user.setStatus(1); userService.save(user); } // 登录成功,把登录后的用户保存 session.setAttribute("user",user.getId()); // 登录成功 删除缓存验证码 redisTemplate.delete(phone); return R.success(user); } return R.error("登录失败"); } } 到这里功能已经实现了,但是在redis的管理工具查看可能会乱码 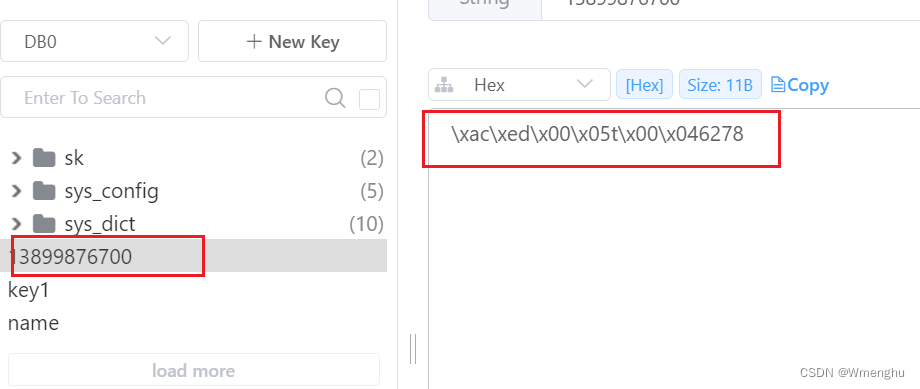
这时需要我们加入自定义的Redis序列化器 import org.springframework.cache.annotation.CachingConfigurerSupport; import org.springframework.context.annotation.Bean; import org.springframework.context.annotation.Configuration; import org.springframework.data.redis.connection.RedisConnectionFactory; import org.springframework.data.redis.connection.lettuce.LettuceConnectionFactory; import org.springframework.data.redis.core.RedisTemplate; import org.springframework.data.redis.serializer.GenericJackson2JsonRedisSerializer; import org.springframework.data.redis.serializer.StringRedisSerializer; @Configuration public class RedisConfig extends CachingConfigurerSupport { @Bean public RedisTemplate<Object, Object> redisTemplate(RedisConnectionFactory connectionFactory) { RedisTemplate<Object, Object> redisTemplate = new RedisTemplate<>(); //默认的Key序列化器为:JdkSerializationRedisSerializer redisTemplate.setKeySerializer(new StringRedisSerializer()); // key序列化 redisTemplate.setValueSerializer(new GenericJackson2JsonRedisSerializer()); // value序列化 redisTemplate.setConnectionFactory(connectionFactory); return redisTemplate; } } 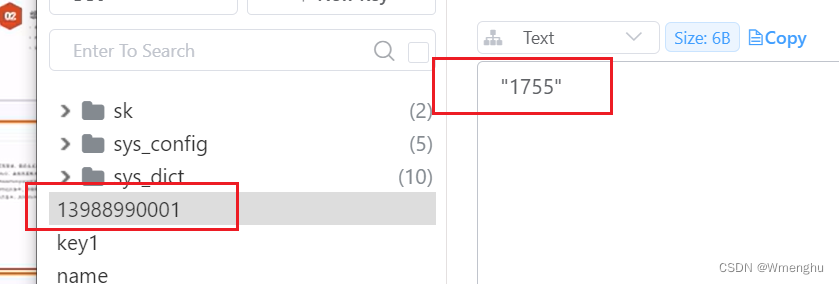
|
|
|
地板#
发布于:2022-08-15 16:03
|
|